


The concrete cylinder is the most common sample type for tests of concrete compressive strength. There are other ways to determine concrete strength, and some methods may be more cost-effective or arguably better, but concrete cylinder testing remains the standard for acceptance.
Well-made concrete cylinders are easy and inexpensive to produce. Typically, one technician posted at the point of discharge or point of placement is sufficient to sample and test concrete batches for the slump, air content, unit weight, and cylinders. Technicians must follow standard practices and be certified in most regions, but training is neither extensive nor complex.
What do Concrete Cylinders Tell Us?
It is essential to understand what concrete cylinder testing is not. Most concrete cylinders cast on the job site are not intended to represent the concrete's in-place strength in the structure. Compressive strength testing of concrete is generally an acceptance check of the mix delivered to the project. So, most field cylinders are made for quality control and product acceptance. The practice for this type of testing is to follow the "standard curing" method noted in ASTM C31 / AASHTO T 23. The initial curing environment is controlled and protected, and the samples are retrieved for final laboratory curing within 48 hours. ASTM method C192 / AASHTO R 39 covers test specimens made in the laboratory, where selection, preparation, and mixing of materials are closely controlled to evaluate mix design characteristics.
In cases where it is necessary to monitor strength development in ambient conditions at the job site or within formwork, there are options for "field curing" in the ASTM/AASHTO practice. Instead of adhering to separate temperature and humidity requirements for initial curing, field-cured cylinders undergo the same moisture and temperature conditions as the structural work. In theory, they should reflect the strength development of the concrete in place. This blog post will focus on standard-cure cylinders made for compressive strength acceptance testing.
What is Needed to Sample Fresh Concrete?
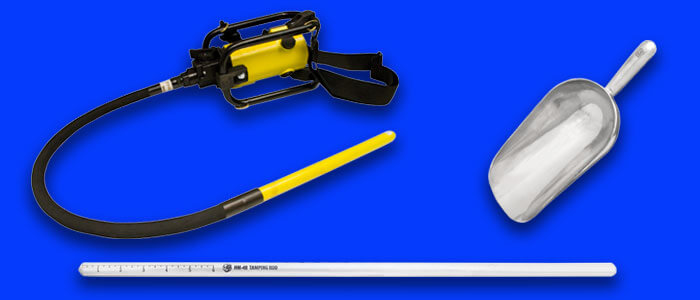
The equipment for sampling and molding concrete cylinders is simple:
- A wheelbarrow or other container to collect a composite sample of fresh concrete from various types of concrete mixers, as described in ASTM C172. Some project specifications may require sampling at the discharge end of a concrete pump.
- A conveniently sized scoop, large enough to collect a representative sample and small enough for easy handling and fresh concrete placement.
- The specified tamping rod. 4x8in and 6x12in cylinders require tamping rods with different lengths and diameters.
- A concrete vibrator is also permitted for consolidation and is required for stiff mixes with slumps of 1in (25mm) or less.
Since the molding of concrete cylinders usually occurs when slump, air content, and unit weight tests are performed, the same sampling and consolidation equipment is often shared between different applications.
Casting Concrete Cylinder Samples
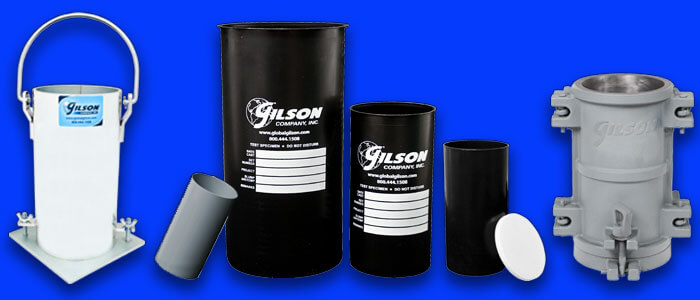
Concrete cylinders cast for acceptance testing are typically 4x8in or 6x12in (100x200mm or 150x300mm) in diameter by length. A wide variety of single-use or reusable concrete cylinder molds meeting ASTM C470/AASHTO M 205 are available.
Cylinders must have a length-to-diameter ratio of 2:1 and a diameter three times the coarse aggregate's maximum nominal size. Concrete mixes with larger aggregate sizes must be wet-sieved to remove material coarser than 2in (50mm). The smaller size and lighter weight of 4x8in cylinders make them a popular choice when test methods and project specifications allow.
- Single-use plastic concrete cylinder molds are convenient and cost-effective in applications where many samples are routinely processed. Their lighter weight makes them easier to transport and handle, and there is no need to clean them. Optional tight-fitting plastic lids effectively prevent moisture loss from concrete samples.
- Reusable steel or cast-iron cylinder molds ensure precise and repeatable sample sizes for smaller-scale operations. With proper care and cleaning, these molds can last for decades.
ASTM C31/AASHTO T 23 requires the molds to be placed on a level, stable surface and filled with the proper amount of fresh concrete; 4x8in molds are filled in two equal layers, and 6x12in molds require three equal layers. Each layer is rodded 25 times, and then the mold is tapped with a rubber mallet to consolidate the sample. When using a vibrator, both cylinder sizes are filled in two equal layers. For each layer, the vibrator is inserted once in 4x8in molds and twice in 6x12in molds. A trowel or the tamping rod is used to strike off the surface and produce a flat, even finish.
Conventional concrete mix designs are based on meeting strength objectives at 28 days of age. Since strength development occurs predictably, early cylinder tests can estimate final strengths. Multiple test cylinders cast from the same fresh concrete sample can forecast strength issues sooner. The exact number of cylinders in a set or timing of earlier tests is mainly left to the specifier but typically includes 3 to 5 cylinders. The controlling test at 28 days consists of the average strength of two cylinders. The other samples may include a test at 3 or 7 days to estimate strength development and a "hold" cylinder if there are discrepancies in the 28-day tests.
Initial Curing: Choose Wisely!
During this sensitive period on the job site, the samples progress through initial and final sets of the concrete mix and begin strength development by hydration. Throughout this stage, they are especially vulnerable to impact, movement, and vibration, so the area designated for initial curing must be selected carefully.
Molding the concrete cylinders at or near their initial curing location saves time and effort and minimizes the samples' disturbance. If that is not an option, the cylinders must be moved immediately to their initial curing location once they are molded and finished.
A suitable location for the initial curing has three essential requirements:
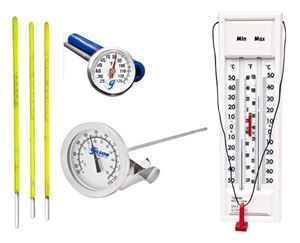
- Ambient temperature must be maintained between 60 and 80°F (16 and 27°C). The temperature must be between 68° to 78°F (20° to 26°C) for mixes with design strengths of 6000psi (40 MPa) or greater; a quick look at the weather forecast will indicate whether insulated containers should be heated or cooled. Be sure to account for the heat generated by the natural hydration of the concrete. Cylinders curing in a closed box can create a surprising amount of heat on their own. Cooling can be accomplished by running or evaporating water, ice, or electrical cooling devices.
- Moisture loss from the specimens must be prevented. An easy and effective way to preserve moisture in the samples is to use tight-fitting plastic lids on single-use cylinder molds. Other strategies described in the specification are partial immersion in water, full immersion in water saturated with calcium hydroxide, and high humidity levels using damp sand or wet burlap.
- The samples must be protected against jarring and vibration. The impact of equipment or people passing by must be avoided. But the effect of vibration is sometimes overlooked. The vibration from nearby machinery or even foot traffic transferred through the flimsy floor of a construction trailer may result in undetectable damage and low test strengths.
The freshly made samples must remain undisturbed in this controlled environment throughout the initial curing period, which may last up to 48 hours.
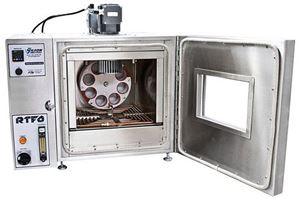
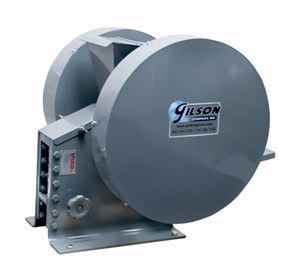
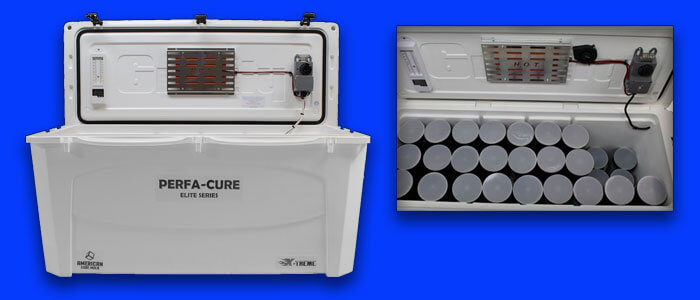
The ASTM/AASHTO standard offers several acceptable options for controlling the initial curing environment, but a well-designed curing box ticks all the boxes. Various models provide heating or heating and cooling, plus options for adding water, damp sand, or damp burlap to prevent moisture loss. Min/max thermometers document temperature levels during the curing period and are included with some boxes.
Transporting Concrete Cylinders
The window of time allowed by C31/T 23 to retrieve the concrete samples ranges from 8 hours after the final set (as determined by ASTM C403) to 48 hours from the molding time. For conventional mixes, assumptions are frequently made that it is safe to handle the samples after 16 to 24 hours. During transport, the cylinders must be cushioned against jarring and protected from freezing and moisture loss. They should remain in their molds during transportation for added protection. It is not ok to toss them unsecured into the back of a pickup truck in the open air!
- Hand-carrying individual cylinders, especially 6x12in specimens, is inefficient and tiring. Cylinder carriers and Cylinder lifting handles allow the convenient handling of two cylinders simultaneously in the field or laboratory.
- Concrete cylinder transport racks are a safe and convenient way to transport concrete specimens in any vehicle. Placing discarded neoprene capping pads at the bottom of the racks provides extra protection during movement.
Final Curing in the Laboratory
The final curing stage for concrete cylinders focuses on providing controlled and consistent moisture and temperature conditions for maximum strength development.
When the concrete cylinders arrive at the testing lab, they should be logged into the laboratory's concrete sample registry, removed from their molds, and placed into the final curing environment without delay. Allowing them to sit in the open air encourages moisture loss and the risk of physical damage.
There are two options for final concrete cylinder curing environments that conform to the requirements of specification ASTM C511/AASHTO M 201. Either option requires curing temperatures of 23.0° ±2.0° (73.4° ±3.6°F), continuously monitored with temperature recorders or data loggers.
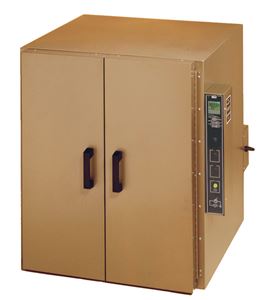
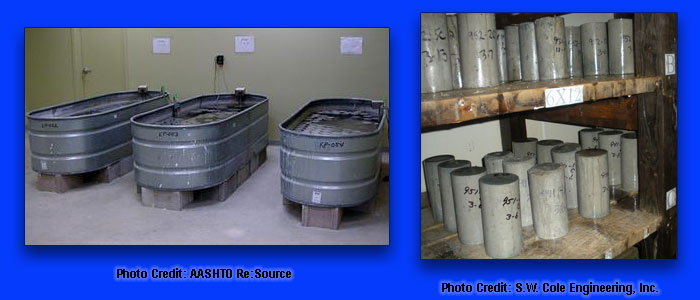
Option 1: Moist-curing rooms are enclosed, with water atomizing devices to continuously maintain condensed moisture on the concrete samples. Control panels are available that combine atomizing methods and temperature control to ensure compliance with the specifications. Measuring and recording humidity levels using humidity meters is optional. C511/M 201 simply states that all specimens must look and feel moist. Moist curing rooms offer the most efficient use of floor space for large numbers of samples using rack or pallet storage.
Option 2: Curing Tanks are filled with lime-saturated water and fitted with curing tank heaters and circulators for curing concrete cylinders and beams. Curing tanks are cost-effective for temporary installations or moderate numbers of samples.
This previous Concrete Curing blog post features an in-depth discussion of the pros and cons of different final curing methods.
Capping Concrete Cylinders
The end preparation of each test cylinder assures an even distribution of the applied forces and that the compressive loads are genuinely axial.
- Sulfur capping compound is the traditional method of end preparation noted in ASTM C617/AASHTO T 231. A mixture of sulfur, fly ash, and mineral filler is heated in a melting pot until flowable. The hot material is poured into a capping mold, and the concrete cylinder end is placed in the molten material. Once cooled, the cap will be level, smooth, and perpendicular to the axis. While widely used and safe, this method uses very hot materials that can be hazardous if not handled correctly.
- Neoprene Pads, also known as unbonded caps or pad caps, are neoprene discs placed on both ends of a concrete cylinder immediately before testing. The pads are confined by a steel retaining ring and distribute loads evenly over the cylinder's surface without the need for handling hot sulfur materials. Requirements for this method are found in ASTM C1231.
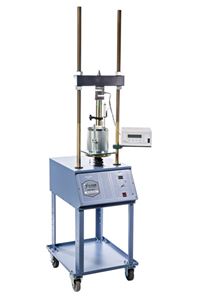
- Concrete cylinder end grinders are a direct way to ensure square ends for accurate compression testing of concrete cylinders. Applicable for any design strength, they are the preferred method for concrete mixes with strengths exceeding 7,000psi (48.3mPa). Cost-effectiveness is best in laboratories with large volumes of higher-strength cylinders to test.
Concrete Compressive Strength Testing
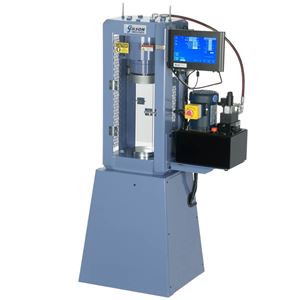
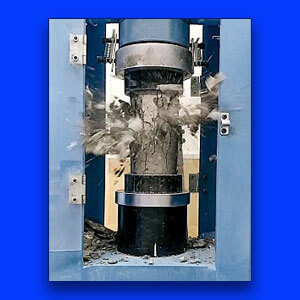
Compression testing of concrete cylinders is the final step in this process and is performed following the standard test method ASTM C39/AASHTO T 22. The prepared concrete test cylinders are placed in a concrete compression machine and loaded axially at controlled rates until failure.
Within the context of construction materials testing, concrete compression machines rank among the highest-capacity loading devices used, and their purpose is straightforward. However, there are defining characteristics to look for when choosing a concrete "break machine."
Important Steps for Compressive Strength Test Procedure
Concrete cylinders for compressive strength must be tested while still moist from the curing room or tank. Essential steps for performing the test:
- Place the cylinder on the bottom platen and align it carefully with the compression machine's loading axis.
- Zero the loading indicator of the compression machine.
- Manually tilt the spherically seated upper platen to align it with the top surface of the cylinder.
- Apply the load. If using unbonded caps, check the sample's perpendicularity with a verification device before the load reaches 10% of the anticipated strength.
- The first half of the total anticipated load can be applied at a higher controlled rate if desired. The latter half of the estimated load must be applied to the specimen at a rate of 0.25 ± 0.05 MPa/s [35 ± 7 psi/s].
- Continue loading the specimen until the load indicator drops off steadily and the cylinder is visibly fractured.
- Record the maximum load and calculate the compressive strength.
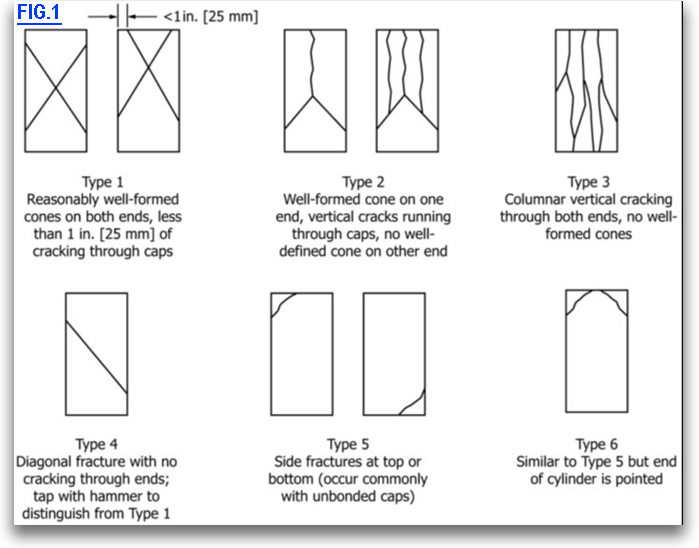
- Describe and sketch or photograph the fracture type, as shown in Fig. 1
Note: Characteristics of some concrete mixes, the load frame, or the capping system may cause some test cylinders to fail suddenly or explosively. As each cylinder is being loaded:
- Ensure the fragment guards of the machine are in place and functional.
- Do not stand directly in front of or behind the compression testing machine.
- Operators and persons nearby should wear personal protective equipment (PPE).
Helpful Concrete Cylinder Testing Resources:
Test Methods and Specifications:
ASTM C31 / AASHTO T 23 - Making and Curing Concrete Test Specimens in the Field
ASTM C192 / AASHTO R 39 - Making and Curing Concrete Test Specimens in the Laboratory
ASTM C470 / AASHTO M 205 - Molds for Forming Concrete Test Cylinders Vertically
ASTM C511 / AASHTO M 201 - Moist Curing Rooms & Water Storage Tanks for Curing
ASTM C617 / AASHTO T 231 - Capping Cylindrical Concrete Specimens
ASTM C 1231 - Unbonded Caps for Cylindrical Concrete Specimens
ASTM C39 / AASHTO T 22 - Compressive Strength of Cylindrical Concrete Specimens
Gilson Videos:
Gilson Single-Use Concrete Cylinder Molds
Gilson Perfa-Cure Concrete Curing Boxes
Gilson Gray Iron 9000 Capping Compound
Gilson Concrete Compression Testing Machines
Controllers for Gilson Compression Machines
We hope this blog post has helped you understand what is involved in making and testing concrete test cylinders.
Gilson Is Here to Help
Contact our testing experts for more information or to discuss your testing application.
Testing Resources
Standard Test Methods, Specifications, and Practices
Individual test methods and specifications referenced in our product descriptions, blog articles, and videos are available for review or purchase from the professional organizations noted.
- ASTM International (American Society for Testing and Materials)
- AASHTO (American Association of State Highway and Transportation Officials)
- ACI (American Concrete Institute)
- State DOTs (Departments of Transportation)
- ISO (International Organization for Standardization)
- BS (British Standards)
- EN (European Standards)