
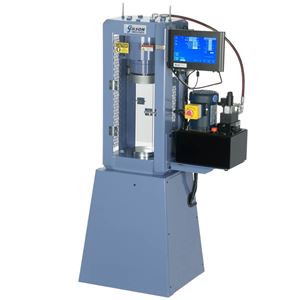
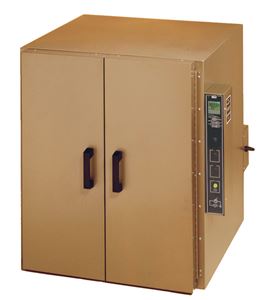


Testing concrete mixes, as delivered to a construction site, ensures the concrete quality and strength characteristics for the completed project. Representative sampling of fresh concrete provides material for on-site temperature, consistency, and air content tests and casting of 4x8in or 6x12in concrete cylinders for laboratory compressive strength testing.
Most concrete strength tests focus on the quality of the concrete as delivered to the project. These laboratory strength test results do not represent the actual in-place strength of concrete structural elements unless steps are taken for special curing and handling of the samples. |
Both ends of the concrete cylinders must be smooth and even to distribute compressive forces evenly and ensure accurate strength tests. The top surfaces of the cylinders are finished in the field and typically do not meet the test method requirements for planeness and perpendicularity. The ends can be saw-cut or ground, but those processes are time-consuming and require expensive equipment. Another option is applying cement paste or gypsum plaster to the freshly molded samples, an operation that requires careful preparation and skill to perform correctly.
The two most popular types of end treatment for cylindrical concrete specimens are sulfur mortar capping and neoprene compression pads. Both have their advantages, as noted in an earlier Gilson blog, Compressive Strength Testing: Sulfur Capping or Neoprene Pads?.
- Neoprene pads are convenient and reusable many times over.
- Sulfur mortar is economical when testing large numbers of cylinders and is often the preferred end treatment for cylinders because of its long history of use.
Sulfur mortar caps produce reliable strength results and consistently display predictable fracture patterns of the test specimen. In some cases, sulfur capping compound is acceptable for testing concrete mixes with higher compressive strength than its own. ASTM C617/AASHTO T 231 is the standard practice for sulfur mortar capping of concrete test cylinders.
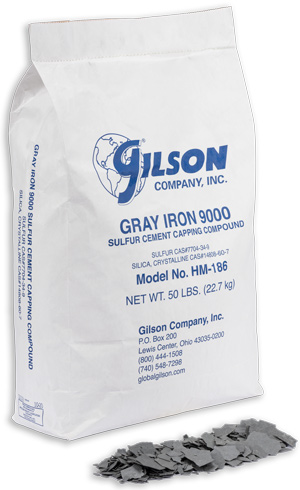
Sulfur Capping Compound for concrete specimens is a sulfur mortar composition using additives like fly ash as filler or to modify characteristics of the material. Some products use a plasticizer to increase flow and improve the ability to fill voids in the concrete surface. Capping compound is produced in flakes for fast, even melting, or solid ingots for convenient storage and handling.
Note: It is important to wear personal protective equipment whenever you are around sulfur capping compound. Heavy gloves, eye protection, respiratory masks, and covering exposed skin prevent irritation and injuries. |
Sulfur capping compound, especially in its molten state, requires some safety precautions, as noted in the Safety Data Sheet (SDS), and should always be used in a well-ventilated area.
When tested as a 2in cube as detailed in C617, the sulfur mortar compound must have a minimum compressive strength of 5,000psi (34.5MPa) at 2 hours of age to test concrete mixes up to 7,000psi (50MPa). The capping mixture gains additional strength over time, up to 9,000psi (62.1MPa) at 24 hours. Tests can be performed on concrete with design strengths higher than 7,000psi if the manufacturer or end-user provides documentation of specified performance tests.
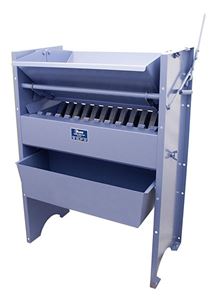
Lab Equipment for Sulfur Mortar Capping
Capping equipment for concrete cylinders is cost-effective and uncomplicated to use.
- A quality melting pot heats the sulfur material evenly., Proper distribution of heat prevents dangerous pressurization of the partially melted compound. Maintaining the correct temperature avoids overheating, excessive fumes, and damage to the mixture properties. The ideal pot capacity is enough to cap all the cylinders to be tested for a given day.
- A cylinder capper produces a cap of the correct thickness correctly aligned with the concrete cylinder. The heavy steel fixtures are precision machined for planeness and perpendicularity and typically bolted to a benchtop.
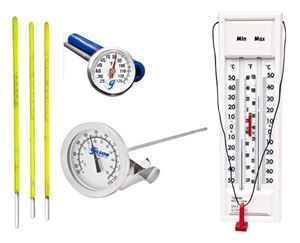
- A rugged thermometer with a range of 400°F (204°C) or more, and with heat-resistant construction will withstand the harsh conditions.
- A metal ladle to pour the molten compound into the capper. The handle should be long enough to reach the bottom of the pot easily.
- Safety equipment, as specified in the SDS for eye, skin, and respiratory protection, protects personnel. ASTM C617 calls for a fume hood vented to the outdoors.
Techniques for Capping Concrete Cylinders
Capping a concrete cylinder is not a complicated process, but like anything, some techniques make it easier and more efficient. Follow the recommendations of the compound manufacturer carefully to prepare the capping material for use.
Note: Capping compound that has been stored in humid conditions or becomes contaminated with free moisture may foam or splatter during heating, creating a hazard. The moisture-contaminated material will not develop the strength required for use.
Melting the Capping Compound
- Place at least enough dry compound in the pot to complete capping for all the day’s cylinders.
- Set temperature controls of the melting pot following the compound manufacturer’s specifications, never higher.
- Keep the lid on the pot during the melting process to conserve heat and reduce fumes.
- Use caution if reheating material is left in the vessel. Lower-quality pots that do not have heating elements in the sidewalls may heat unevenly and trap pressure from below before the top surface melts. Leaving a metal rod or the pouring ladle in the pot during the cool-down and reheating cycle will prevent the build-up of pressure.
- When the compound appears fully melted, stir it thoroughly and check the temperature to ensure it complies with the instructions. The mixture should be homogenous and free-flowing. If overheated, it becomes too thick and viscous to use. In most cases, reducing the temperature while stirring will thin it back to a pourable consistency.
Heating the Cylinder Capper Plate
Warming the capper plate before the first use optimizes cap thicknesses and quality. The compound will harden evenly and allow consistent cap thicknesses.
- Brush the recess of the capping plate with a light coating of mineral oil or unused engine oil.
- Use the ladle to pour the compound into the recess until it is nearly full.
- Allow the compound to harden as it heats the plate for a few minutes.
- Using a wooden or hard plastic mallet, break the hardened compound out of the plate and discard it. (It may be recycled, following the restrictions in the test method.)
Preparation of the Concrete Test Cylinders
Before capping, check the concrete cylinder for compliance with the dimensional tolerances of ASTM C39. There may also be requirements to measure the specimen density at this point.
Cap thickness should ideally be about 1/8in (3mm) for reliable test results. The maximum cap thickness cannot exceed 5/16in (8mm) at any point. The cylinder must be examined for conditions that would affect the thickness and quality of the cap or the accuracy of the strength test results. |
- The surface moisture of the curing strength specimens must be maintained during capping operations. At the same time, the capped surfaces must be dry enough to avoid the formation of steam pockets on contact with the hot compound.
- Limit the time away from moist rooms or curing tanks.
- Wrap or cover the exposed cylinders with wet burlap.
- Dry the ends of the cylinders with a towel immediately before capping.
- Examine the top surface of the cylinder for finish quality and planeness. If it does not meet the test method requirements, it may be necessary to grind or saw-cut this surface. If the issue occurs frequently, it is a sign that finishing practices in the field are not adequate.
- Test cylinders cast in reusable metal molds or coated cardboard molds may have a residual surface coating of release oil or paraffin wax. This residue must be removed from the ends with a wire brush before capping.
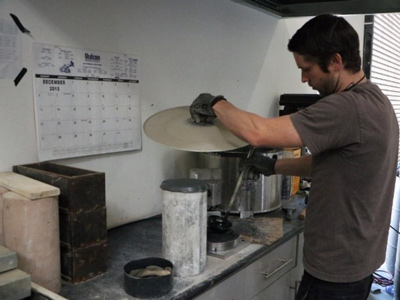
Capping a Test Cylinder
Once the steps for preparing the concrete test cylinders and capping compound are complete, the actual capping process is straightforward.
- Using a brush or rag, lightly coat the recess of the capper with mineral or engine oil as a release agent. Do not use penetrating oils, and do not place oil on the concrete cylinder itself.
- Use the ladle to stir the prepared capping compound and scoop out material to pour into the recess of the capper. Do not completely fill the recess; experience will help you fine-tune the exact amount required. Don’t worry if there is some overflow at first.
- Pick up the concrete cylinder by firmly grasping the sides and placing it squarely against the upright alignment fixture of the vertical cylinder capper, with the bottom surface positioned an inch or two above the molten compound.
- Slide the cylinder downward slowly and steadily into the compound while maintaining the vertical alignment. Sliding the cylinder down too quickly may cause the molten compound to splash and may cause serious burns to unprotected skin.
- Hold the cylinder in position for a few seconds until you see the compound hardening around the perimeter, then you can release it.
- Let it sit undisturbed until the compound has hardened completely. This time will vary based on temperatures of the mixture, capping plate, and cylinder, but should be from fifteen to thirty seconds.
- Place a rod between the cylinder and alignment fixture to lever against the upper part of the cylinder, tipping it forward slightly to release the bond from the capper. Gilson’s vertical cappers feature a built-in mechanism for this step.
- Let the cylinder return to vertical, then grasp it on each side to lift it out and away from the capper.
- The caps must cure for a minimum of two hours before testing and may require sixteen hours or more when testing higher-strength concrete mix designs.
Check the Quality of the Cap
The thickness and overall condition of the cap have a significant impact on the accuracy of the strength test results. There are some simple checks to monitor quality.
- After capping, allow the cap to cool and check for voids or steam pockets by tapping the surface with the edge of a coin and listening for a difference in sound quality.
- With a straightedge and a 0.002in (0.05mm) feeler gauge, check for planeness in at least three areas of the cap.
- After the compressive strength test is complete, break off the caps and measure the thickness. The standard test method specifies permissible cap thicknesses for different strengths, but in general, caps that are both thin and consistent produce the most reliable results.
Recycling of Capping Material
Reusing sulfur mortar capping compound is permissible in some cases but has some limitations. If carefully managed, the practice can reduce expenses. Used capping compound, including material left in the pot, can be reused up to five times to test concrete mixes with design strengths up to 5,000psi (35MPa). Reuse is not permitted with higher-strength mixes.
Eventually, the continued reheating and increased inclusion of contaminants such as water, dirt, or release oil change the properties of the material. It may foam when heated, become too thick to pour correctly, or lose strength. Increased frequency of strength tests on mortar cubes and visual observation of material characteristics will help determine when to discard the material.
We hope this blog post has provided some guidance on equipment selection and procedures for capping concrete test cylinders.
Gilson Is Here to Help
Contact our testing experts for more information or to discuss your testing application.
Testing Resources
Standard Test Methods, Specifications, and Practices
Individual test methods and specifications referenced in our product descriptions, blog articles, and videos are available for review or purchase from the professional organizations noted.
- ASTM International (American Society for Testing and Materials)
- AASHTO (American Association of State Highway and Transportation Officials)
- ACI (American Concrete Institute)
- State DOTs (Departments of Transportation)
- ISO (International Organization for Standardization)
- BS (British Standards)
- EN (European Standards)