


Proctor Compaction Test
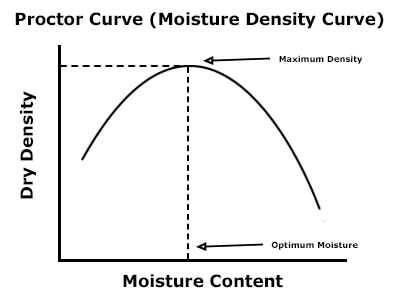
The Proctor Compaction Test establishes the maximum unit weight that a particular type of soil can be compacted to using a controlled compactive force at an optimum water content. This is the most common laboratory soil test and the basis for all engineered compacted soil placements for embankments, pavements, and structural fills. In-place measured densities of the compacted fill are compared to the Proctor test results to determine the degree of soil density.
Soils are the most basic and least expensive construction materials available. For all of human history, construction projects from primitive burial mounds to modern interstate highways have removed, replaced, filled, or shaped the soil surface to accommodate pavements and structures or to make the earthwork itself a structure. Experience and experimentation have taught us that compacting the soils we place makes the installation more permanent, along with some other advantages.
Benefits of Soil Compaction
- Bearing capacity and stability are increased
- Permeability (hydraulic conductivity) is decreased
- Heaving from freeze-thaw cycles is reduced
- Erosion can be controlled
- Subsidence is reduced
Because soils are natural materials, it’s nearly impossible to predict their properties accurately enough for engineering applications without specific tests. Manipulating the characteristics of soils by compaction naturally raises some questions. We know that nearly any mechanical compactive effort will make soil denser, but which methods work best for each soil type? What role does moisture play? Most importantly, how does the maximum soil density that we find in our laboratory tests relate to the soil densities we find in the field?
History and Use of the Proctor Test
It has long been known that the moisture content of soils, particularly cohesive soils, has a direct impact on how efficiently they can be compacted by construction equipment. But because the soil is a natural material and the ideal moisture content and maximum dry weight varies for each soil type, the questions of the best unit weight and ideal moisture content couldn’t be answered.
The Standard Proctor
In 1933, Ralph R. Proctor, a resident engineer for the Los Angeles Department of Water and Power, established a laboratory procedure to define the practical maximum density of a soil sample along with the optimum moisture content needed to achieve that density. That concept is known today as the moisture-density relationship test, laboratory compaction characteristics of soils, or simply the standard Proctor test, and is detailed in ASTM D698 and AASHTO T 99 test methods.
Unit weights and moisture content field tests could now be expressed as a percentage of the laboratory values for the same soil, making it easier for the designer to specify what was required and to document the suitability of the work performed in the field. Knowing the optimum moisture content gives clear guidance for whether the soils being compacted should be made drier or wetter to make everyone’s job easier.
The Modified Proctor
In the latter part of World War ll and later into the 1950s, heavier dynamic loads from larger aircraft and heavier, more frequent truck traffic were placing greater demand on pavements and soil subgrades. Sometimes the compacted soils had passing density tests based on standard Proctor values but were still deflecting too much under load to carry the increased forces.
In simple terms, densities were too low, and optimum moisture was too high for these increased loadings. At the same time, field compaction equipment was becoming larger and more efficient, making it possible to compact soils to higher densities at lower moisture contents. The modified Proctor test was introduced in 1958 as ASTM D1557 and AASHTO T 180 to help with these applications at higher loads.
Standard vs Modified Proctor
Test procedures are similar, but the laboratory compactive effort of the modified method is higher. Using a 10lb (4.54kg) hammer with 18in (457.2mm) free-fall instead of the 5.5lb (2.49kg) hammer with 12in (304.9mm) drop. This results in higher maximum soil densities at lower optimum moisture contents. The modified Proctor is used today concurrently with the standard Proctor.
The selection of the method is based on project requirements and specifications. This blog post will focus on the significance of soil compaction (particularly the Proctor Test), how the test is performed, the necessary equipment, and helpful tips.

What is the Proctor test?
The standard and modified Proctor test procedures are straightforward. Prepared soil specimens with progressively higher moisture contents are compacted into molds with known volumes and weighed, then their unit weights are calculated in pounds per cubic foot or kilograms per cubic meter. Unit weights will increase with higher moisture contents leading up to the optimum moisture, then decrease past that point.
The dry unit weight for each compaction cycle or “point” is calculated by correcting for the moisture content. The results are plotted with moisture on the horizontal axis and dry unit weight on the vertical to form a curve that defines maximum dry density and optimum moisture content.
NOTE: There are variations of test procedures noted in both the standard and modified test methods that are dictated by the maximum particle sizes of the soil samples. The variations affect the preparation of the samples, test practices, and the type of equipment required. The reader is encouraged to carefully read and understand the ASTM or AASHTO test methods.
Proctor Compaction Test Equipment:
Compaction Testing Equipment required for performing the laboratory proctor test is also straightforward and widely available. The list below is a good start:
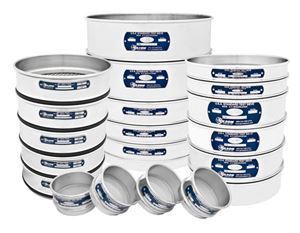
- Compaction (Proctor) Molds with either 4in or 6in diameters to hold compacted samples
- Proctor Hammers are manually operated drop hammers to compact standard or modified Proctor soil specimens into compaction molds
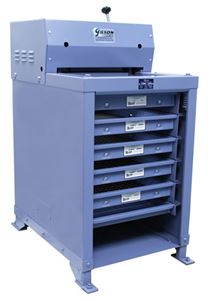
- Mechanical Soil Compactors automatically compact Proctor density specimens with the proper number of hammer blows and shut off when a preset number is reached.
- Stainless Steel Straightedge levels and trims Proctor density specimens to size in molds
- Balance or Scale compliant with D4753 and 1g readability to weigh the dry unit sample after compaction
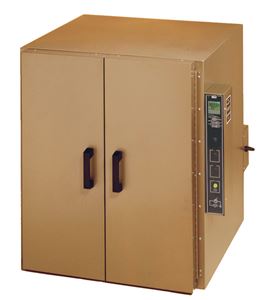
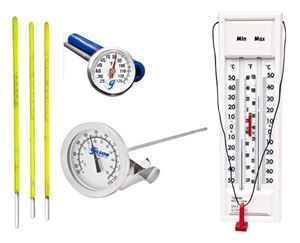
- Drying Oven that maintains uniformity to 230 ± 9°F (110 ± 5°C), for moisture content determinations
- Test Sieves for particle size determinations
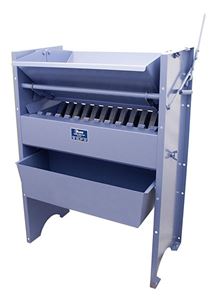
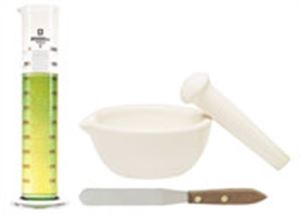
- Sample Pans & Trays for air drying, processing, and mixing of soil samples
- Sample Pans & Trays for air drying, processing, and mixing of soil samples
Proctor Compaction Test Procedure
A representative bulk field sample is obtained for each type of soil material proposed for use in the earthwork operation. Weights required for the bulk sample will range from about 50lb to 100lb (23kg to 45kg) of the moist sample, depending on the test method specified. Back in the lab, processing of the samples begins with gradual air-drying to the desired moisture, usually around 10% or more below the anticipated optimum moisture. For cohesive soils, this can be expedited by breaking down clumps and spreading the sample out on open trays.
Once the soil is friable enough, the breakdown can continue more thoroughly. It is important to read and understand your particular test method carefully, as there are several variables that can affect this stage of sample preparation. For most standard and modified Proctor variations, this means reducing the finer materials to pass through either a 4.75mm (No.4) or a 9.5mm (3/8in) sieve.
Coarser materials are set aside for particle size determinations and, in some cases, for adding proportionally back into the final test specimens. At this stage, sample breakdown and coarse particle sizing are often performed concurrently.
Four or five specimens are prepared for the compaction points with increasing moisture content that will bracket the estimated optimum water content. This requires some guesswork, and experience is always helpful. The approximate optimum moisture of most cohesive soils can be estimated by manually squeezing a portion into a lump that will stick together yet break cleanly into two sections when “bent”. The weight of the specimens should be about 5lb (2.3kg) each for 4in (102mm) molds and 13lb (5.9kg) for 6in (152mm) molds to ensure enough compacted volume to completely fill the molds.
Water is added incrementally and mixed thoroughly to increase the individual moisture contents for each specimen by about 2%. The prepared specimens are set aside in closed containers for a prescribed amount of soaking time ranging up to 16 hours for proper moisture conditioning. The containers can be sealed metal cans, but heavy-duty zip-closure bags also work well for this step.
NOTE: This article serves as an informational guide to equipment and techniques used to perform the Proctor moisture/density relationship tests as described in ASTM D698 and D1557 or AASHTO T 99 or T 180 test methods. The information contained herein is in no way intended to supersede the specifications or test protocol of these published test methods.
Compaction Process
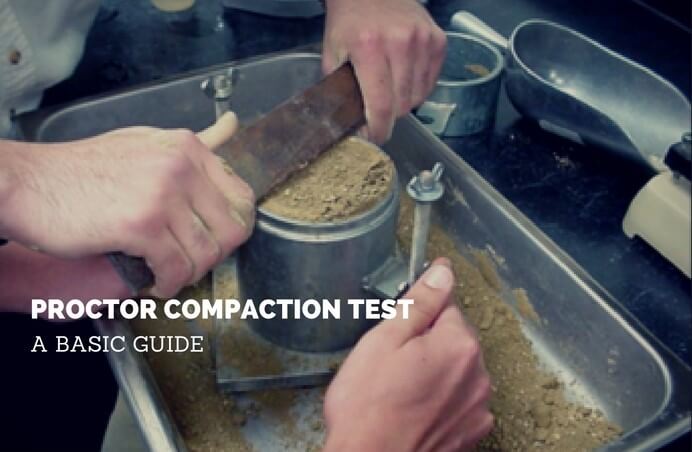
For each Proctor point, the operator compacts the specimen into the pre-weighed soil compaction mold assembly in three to five layers (lifts) according to the method required. The manual soil compaction hammers are lifted to their maximum height and allowed to fall freely onto the soil specimen for the required number of blows. For standard Proctors, the hammers weigh 5.5lb (2.5kg) and drop 12in (305mm). The modified Proctor method uses a 10lb hammer with 18in (457mm) drop height for compaction. Automatic/mechanical compactors are also available to make this process easier.
After compaction, the collar is removed, and excess soil is carefully trimmed with a straightedge tool, so the compacted soil is flush with the top of the mold. Small voids can be manually filled with excess sample material. The mold with the sample is then weighed and recorded, and the soil is extruded from the mold. A sample of the specimen is obtained to determine the exact moisture content by oven drying, and the process is repeated for subsequent samples.
The moist density, or unit weight, of each compacted specimen is computed by dividing the mass of the soil (minus the mold assembly) by the volume of the mold. To find the dry density, divide the moist density by the percent moisture divided by 100, plus 1.
For the initial points, the mass and the dry unit weight of the soil will increase as the additional moisture lubricates particles and allows them to be consolidated into a denser state (fewer air voids) using the same compactive effort. After about the third point (if you’re lucky and your estimates were correct), the dry density of the sample will decrease as the volume of water reaches a point where it displaces soil particles in a given volume. This indicates that optimum moisture has been exceeded and having another point beyond that will make it a bit easier when constructing the final compaction curve.
The Compaction Curve
The mass of each specimen is used to calculate wet unit weights, and the oven-dried moistures are used to determine a dry unit weight for each point.
Plotting Proctor Compaction Test Results
The results are plotted on a graph as dry unit weight vs. moisture content and will show the curvilinear relationship that allows the maximum dry weight and optimum moisture for each type of soil to be established.
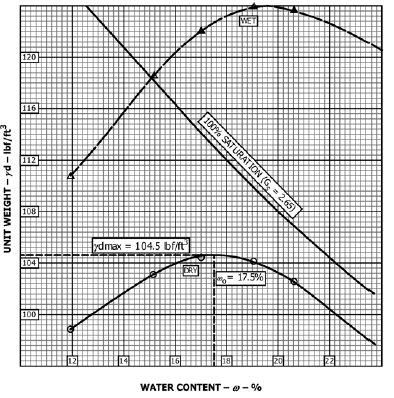
Example of Plotting Wet Density, Dry Density, and Saturation Curves
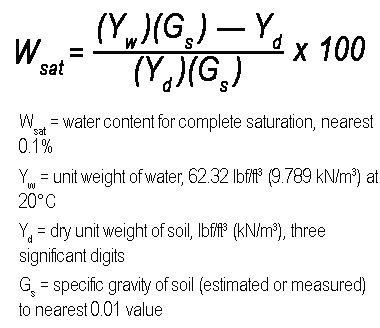
The saturation curve, or zero air voids curve, is a plot of soil density vs moisture at a theoretical 100% saturation level (zero air voids). Points for plotting the curve are calculated from compacted dry unit weights of the sample material adjusted to moisture contents at 100% saturation, using this formula stated in the ASTM D698 standard test method, among others:
The saturation curve serves as a guide when plotting dry unit weights on the soil compaction curve. The wet side of the compaction curve should roughly parallel the saturation curve. In theory, if the two curves intersect, there has been an error in testing, calculating, or plotting the results.
When performing a field density test, the dry unit weight is compared to the maximum dry weight of the Proctor tests to calculate a percent of compaction. When the required densities are hard to reach in the field, the moisture content should be compared to the optimum moisture content from the lab tests. If field moistures differ more than 2% or 3%, it becomes more difficult to compact to the required density. Field moisture can be adjusted by aerating/discing the soil or by adding water.
Troubleshooting
When testing field densities, the dry unit weight from the density test is compared to the maximum dry weight from the laboratory Proctor to calculate a percent of compaction. If field compaction percentages are too low or seem too high, there are some things to consider: • The compaction energy from heavy equipment dissipates as the depth of the loose soil layers increases. If an 18in (450mm) layer (lift) of soil cannot be compacted to the required percentage, try reducing the lift thickness to 10in or 12in (250mm or 300mm) or increase the number of passes.
- If the field moisture content of the soil differs from the laboratory optimum moisture by more than 2% or 3%, it becomes more difficult to compact the material to the required density. Field moisture can be adjusted by aerating/discing the soil or by adding water.
- Check that the compacted soil is the same as the laboratory proctor sample. AASHTO T 272 is a “one-point” field test performed using the same type of mold, compaction hammer, and the number of blows as the original lab method. The moisture content is determined using a gas-pressure moisture tester or propane hot-plate dry-back methods. Field density and moisture values are plotted against the original laboratory data or a family of curves compiled from regional soil data to confirm a match.
Tips
- Heavy-duty plastic freezer bags are a convenient option for the storage and moisture conditioning of individual compaction specimens.
- When preparing individual compaction specimens, it doesn’t take much time to prepare a couple of extra in case your estimates are a bit off. Set up one on the drier side and one on the wet side to cover the bases.
- Some methods and materials require adding coarse native material back into the final specimen. Set aside your plus-size material as you break down the bulk sample. It’s also convenient to sieve the coarse material now to reduce handling.
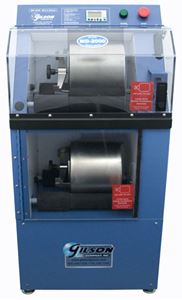
- Using a Sample Ejector expedites the removal of compacted soil from the mold, increasing testing speed and efficiency and making it easier to obtain a representative moisture sample.
- Running five or six points of the proctor test can be physically demanding, especially with a modified Proctor using a 10lb hammer to compact five layers with 56 blows each. If you’ve been staying away from the gym lately, you might want to call in a favor or two, or better yet, consider a Mechanical Soil Compactor. This device reduces effort and greatly enhances repeatability and accuracy.
We hope that you have found this blog post helpful in understanding the procedures and equipment used to perform the Proctor compaction tests of soils by the noted ASTM/AASHTO methods. Gilson supplies a complete line of soil compaction and Proctor equipment and accessories.
Gilson Is Here to Help
Contact our testing experts for more information or to discuss your testing application.
Testing Resources
Standard Test Methods, Specifications, and Practices
Individual test methods and specifications referenced in our product descriptions, blog articles, and videos are available for review or purchase from the professional organizations noted.
- ASTM International (American Society for Testing and Materials)
- AASHTO (American Association of State Highway and Transportation Officials)
- ACI (American Concrete Institute)
- State DOTs (Departments of Transportation)
- ISO (International Organization for Standardization)
- BS (British Standards)
- EN (European Standards)