
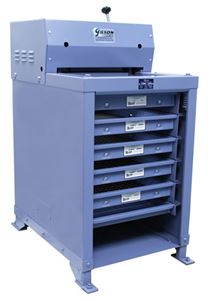
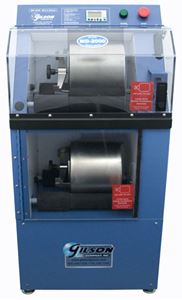
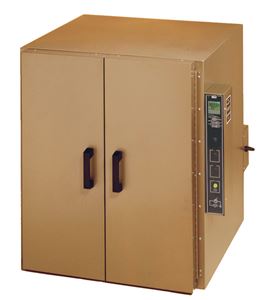


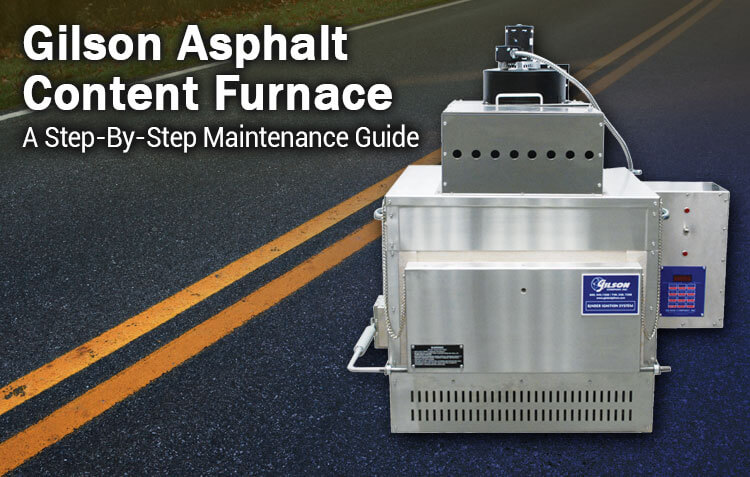
Testing the binder content of a hot-mix asphalt sample confirms that the properties of the material being laid down are identical to what’s called for in the mix design. The Gilson HM-378 Asphalt Content Furnace is a simple, cost-effective option for testing of hot-mix asphalt materials for binder contents up to 10%. It is an acceptable standard test method noted in ASTM D6307 and AASHTO T 308 specifications and equivalent in accuracy and test times to the NCAT model. Like any asphalt content furnace, it simply burns away asphalt bitumen, leaving behind the mineral aggregate components, ready for particle size gradation testing.
Today, we’ll focus on maintenance of the Gilson Asphalt Content Furnace by covering essential maintenance tips to ensure the best performance and many years of use.
Hey, Keep it Clean!
The exposed elements of the HM-378 can be affected by contamination with dust, debris, and aggregate particles. We recommend frequent cleanings by firing the furnace with an empty chamber at a higher temperature to burn off residue. When the firing is complete and the chamber is cool, look inside and check the elements for contamination or burned spots. The firebrick should not be marked with soot or residue and should appear clean. Use a shop-vac with a soft brush attachment to gently clean dust and particles out of the interior, especially the grooves in the firebrick where the elements are seated.
Let it Breathe!
Check the air filter in the top plenum of the furnace often and replace it before it becomes clogged. If it seems blocked with soot after only a few firings, there may be an issue with afterburner chamber temperatures being too low, insufficient room air for proper exhaust flow, or blocked vent holes. Put a call into Gilson’s Technical Support Staff and we’ll help you pinpoint the problem.
Stay in the Groove!
Along with being kept clean, the elements need to stay seated properly in the grooves of the firebrick. If they are fired with lengths that bulge out of the grooves, they can flex back and forth with temperature fluctuations and will eventually fail. The manual has detailed information on both proper seating and proper installation of elements.
Chip off the Old Block
Although the firebrick lining can be brittle, it will actually sustain a lot of wear and tear before performance is really affected. Still, in cases where chips or gouges at the opening may let too much air in, or where broken grooves allow the elements to bulge out, you’ll need to do some repairs. Ask for our RPHM-378-17 Firebrick Repair Compound. Just mix the powder with water and apply directly to the bricks.
We Run a Tight Ship
It’s a good idea to occasionally check the element connections and make sure they are tight. Repeated temperature cycles can loosen the clamping screws and cause problems from poor electrical connections. These connections should be REALLY tight. While you’re at it, take a look at ceramic stand-offs and insulators to make sure they’re in good shape. As always, call our Tech Support folks with questions and we will make sure your furnace stays in great shape!
Repair Help FAQ’s
My Furnace isn’t heating while firing. What should I check for?
If the furnace stops heating while firing, start by checking fuses or circuit breakers. A blown fuse or tripped circuit breaker is not necessarily an indication of electrical trouble with the furnace. A short circuit causes a large amount of current to flow, generating so much heat that the fuse or breaker opens the circuit almost instantly. If the furnace should blow a fuse after firing for some time, there is little probability of a short. Replace the fuse or reset the breaker, and, if it does not blow again as soon as the furnace is turned back on, there is no short in the furnace wiring. A loose or poor connection at the fuse or breaker will generate heat. If the fuse or circuit breaker panel feels unusually warm, have an electrician check for loose connections, particularly at the center screw of the fuse socket, even in a new fuse box.
My Furnace is heating, but it’s taking a long time. What should I look for?
The furnace should preheat to desired conditions in one hour or less. If not, check first to see that both main chamber elements are heating properly. Another possible cause could be a low voltage supply. A minimum of 200V is required. If the furnace fires too slowly and the elements are ok, have the power company check your voltage.
My controller display won’t turn on. What should I do?
First, check circuit breakers or fuses for the wall outlet. Then, disconnect the furnace from any power supply. Remove the furnace fuse and check it by placing the leads of an ohmmeter on the ends of the fuse. If the ohmmeter reading is 0 ohms, the fuse is okay. If the reading is infinity or no needle movement, the fuse is bad. Replace a bad fuse with an SS2-250mA, 250VAC fuse.
Next, check the controller board with a voltmeter. Make sure the furnace is unplugged. Remove the four screws holding the controller board faceplate to the switch box. Lift the faceplate out of the box and let the board hang on the box with the back of the board facing you. Plug the furnace back in. Touch the voltmeter probes, in AV Volt mode, to connectors with the orange and white wires. Make sure the voltmeter is in the AC mode when placing the probes on these connectors. If you find voltage (approximately 20V AC) present, that means current is reaching the board from the transformer, so the board is probably defective.
If there is no voltage, the transformer is probably defective. But before replacing the transformer, disconnect, and lockout the power supply. Remove the switch box and look for both a disconnected wire between the cord set and transformer and between the transformer and the controller board.
Tips
- Before firing the Furnace for the first time, make sure heating elements are seated in their grooves. They may have become dislodged during shipping. See the manual for detailed instructions.
- Position the Furnace in a well-ventilated, covered, and protected area, leaving a minimum of 12in (305mm) clearance between the furnace and the wall.
- Always wear heat resistant gloves and a face shield when loading or unloading samples.
- Place the Furnace on a level, fireproof surface. The HMA-810 Furnace Support Stand accessory has a convenient working height. If you don’t use the accessory stand, we recommend a metal table.
- Keep the power supply cord away from the side of the Furnace because the case is hot during firing and touching could damage the cord set.
- Check filters prior to each firing and change before they clog to extend service life.
Gilson Is Here to Help
Contact our testing experts for more information or to discuss your testing application.
Testing Resources
Standard Test Methods, Specifications, and Practices
Individual test methods and specifications referenced in our product descriptions, blog articles, and videos are available for review or purchase from the professional organizations noted.
- ASTM International (American Society for Testing and Materials)
- AASHTO (American Association of State Highway and Transportation Officials)
- ACI (American Concrete Institute)
- State DOTs (Departments of Transportation)
- ISO (International Organization for Standardization)
- BS (British Standards)
- EN (European Standards)