


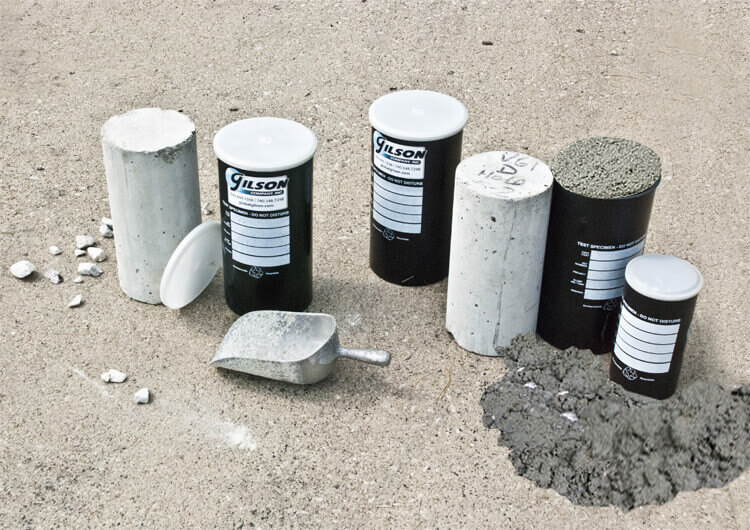
Not long ago, I drove past a construction site on my daily commute and noticed a set of four test cylinders, apparently cast during a recent concrete placement. I also noticed they were standing fully exposed on a sunny day with temperatures in the high 80’s (31ºC) and perched precariously on a pile of dirt. What could possibly go wrong? Day after day, they sat there. One day, one was tipped over, and a day later, another had rolled down the dirt pile on its side. It was nearly two weeks before they were gone. I honestly don’t know the outcome, but I wonder if the contractor had to needlessly jackhammer out good concrete just because those strength samples were mistreated.
Why is Concrete Testing Important?
It may come as a surprise that most concrete tests are not meant to reflect the characteristics of the concrete in the structure or pavement itself, but rather to verify the quality of the concrete as delivered to the job site. This blog post will walk you through some basic methods to ensure your concrete specimens live up to their full potential.
In ASTM C31 and AASHTO T 23, testing for these purposes requires “standard curing”. “Field curing”, (not discussed here) is used when the intent is to judge the condition and quality of concrete in the structure.
The initial cure is a critical stage in strength development that takes place between the time the specimens are molded and when they are delivered to the lab for final curing. This is a time when there are abundant opportunities for mishandling and mistakes that could directly impact the outcome of strength tests.
4 Reliable Steps for Reliable Concrete Test Cylinders
Location, Location, Location
Flat, level, stable, and protected sums it up. Your samples should be molded as close as possible to their storage place, and that place should meet these requirements. Flat and level are easy to figure out, you want the exposed surfaces to remain on the same plane as when you struck them off. Stable and protected means they need to be safe from being struck or tripped over and from vibration. Someone walking nearby on the floor of a construction trailer can permanently damage your samples, especially if they are in that sensitive stage between an initial and final set.
- Our recommendation: Concrete Curing Boxes, to isolate strength specimens from disturbances and maintain specified temperatures according to ASTM C31 and AASHTO T 23 test standards. Any can be used for moist curing, and they are a great portable solution for protecting freshly made test specimens.
It’s a Hot Time in the Old Town
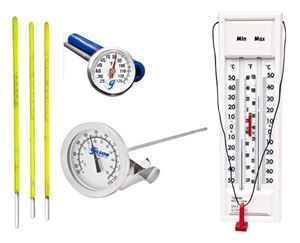
For initial curing, most samples' ambient temperature must be between 60 and 80ºF (16 to 27ºC). For mixes with a design strength of 6,000psi (40MPa) or more, that narrows to 68 to 78ºF (20 to 26ºC). You may not always need a total enclosure to meet that range, but it’s hard to predict when you will not. You must shield them from direct sunlight, and you must be able to document the maximum and minimum temperatures during the initial cure.
- Our recommendation: the MA-161 or MA-162 Max/Min Thermometers. These offer a simple and economical way to monitor initial curing conditions. Our MA-324 4-Channel Data Logging Thermometer can retain additional data and documentation.
Water Under the Bridge
Water in the concrete mix combines with cement to cure over time and gain strength, so if your samples are losing moisture, they are also losing potential strength. For concrete cylinders, the easiest and surest way to prevent this is to use snug-fitting plastic caps on the cylinder molds. Beams or cubes can be covered with plastic. Specimens can also be immersed in calcium hydroxide-saturated water, or the humidity in an enclosure can be maintained at a high enough level to prevent moisture loss from the samples.
- Our recommendation: the HM-156 and HM-157 snug-fitting plastic lids for our HM-151 and HM-152 Plastic Concrete Cylinder Molds. They prevent moisture loss and help retain the shape of the molded concrete test cylinder.
Movin’ on Up
Concrete strength specimens cannot be moved sooner than 8 hours after the final set (described in ASTM C403) and must be stored in their final curing location within 48 hours after molding. They must be kept stable and cushioned during transport and protected from freezing or moisture loss. For shorter trips back to the lab, freezing and moisture loss can be prevented by insulation, covering, and leaving the plastic caps on the molds. For longer periods, they should be transported in the heated area of a vehicle.
- Our recommendation: the HM-114 or HM-116 Cylinder Transport Racks for secure and stable transport of 4in or 6in diameter concrete cylinders. The HM-161 and HM-188 Cylinder Carriers make it easy to handle 6in cylinders on the job or in the lab.
For more information, speak to one of our testing experts.